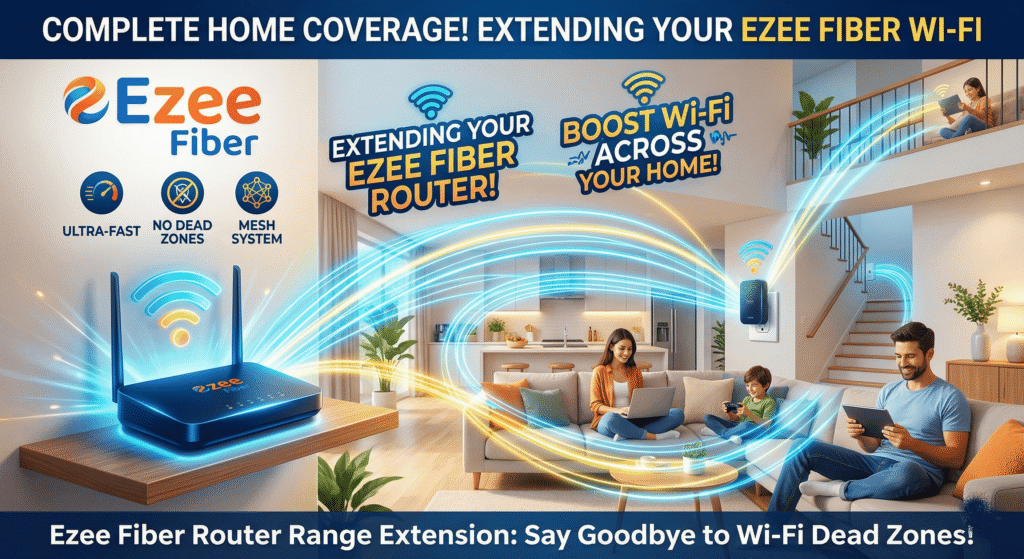
How to Add an Extension to Ezee Fiber Router In today’s connected homes, a single router rarely provides perfect Wi-Fi coverage from thefront door to the back patio. If you are an Ezee Fiber customer experiencing slow speeds in the upstairs bedroom or frustrating drops in your home office, you need a solution that goes beyond a basic booster. You need a native Ezee Fiber mesh extension.
Unlike generic Wi-Fi repeaters that create a new, weaker network, a native extension (sometimes called a satellite node) works in perfect harmony with your primary Ezee Fiber gateway. They create a seamless mesh network, broadcasting a single Wi-Fi name and password throughout your home. This allows your devices to transition from node to node without a hitch, ensuring that the blistering fast symmetrical fiber speeds you pay for are available in every corner.
This guide provides a comprehensive, step-by-step walkthrough on how to add a native extension to your Ezee Fiber router safely, effectively, and with minimal downtime. We’ll cover optimal placement, the standard setup procedure, and the advanced app configurations that ensure peak performance.
Why a Native Ezee Fiber Extension is the Superior Choice
While you could technically plug a generic, third-party Wi-Fi extender into your Ezee Fiber system, it is rarely the best path. Generic extenders often cut your available bandwidth in half (as they must use the same radio to communicate with the router and your devices simultaneously) and create independent networks with different names (e.g., “Home_WiFi” vs. “Home_WiFi_EXT”). Your devices will stubbornly cling to a weak signal from the main router even when they are right next to the extender.
A native Ezee Fiber mesh extension utilizes a dynamic process called “self-healing.” These intelligent nodes are managed centrally by the primary gateway. They feature:
-
Seamless Roaming (802.11k/v/r): Your devices are actively steered to the node offering the strongest, fastest signal without interrupting your stream or video call.
-
Dedicated Backhaul: Native nodes often use a hidden, high-speed connection (either a dedicated Wi-Fi band or a wired Ethernet cable) to communicate back to the main router. This leaves the primary 2.4GHz and 5GHz bands completely free for your devices.
-
Centralized Management: All your nodes, connected devices, and parental controls are managed through a single interface, usually a dedicated Ezee Fiber smartphone app.
Preparation: How to Add an Extension to Ezee Fiber Router Gather Your Gear and Find the Sweet Spot
Before you begin the setup process, ensure you have everything you need. Your extension kit should include:
-
The Ezee Fiber Extension Node (this may look similar to your main router but is a secondary unit).
-
A Power Adapter.
-
An Ethernet Cable (this is optional but highly recommended for a superior wired connection).
Optimal Node Placement: The Critical Step
If you learn only one thing from this guide, make it this: Placement is everything. A mesh system works by passing a strong signal from one node to the next. If you place your extension too far from the primary gateway, it cannot receive a strong signal to repeat, and your speeds will remain abysmal.
Your goal is to find a location that is approximately halfway between your main Ezee Fiber router and the dead zone you are trying to cover.
Golden Rules of Mesh Node Placement:
-
Place in the Open: Never tuck a Wi-Fi node inside a TV cabinet, behind a sofa, or in a metal enclosure. Wi-Fi signals need an unobstructed path.
-
Elevate: Place the node on a shelf or console table, rather than on the floor. Elevation helps broadcast the signal outwards and downwards.
-
Avoid Physical Obstructions: Thick brick walls, concrete, and large mirrors are significant barriers to Wi-Fi signals. Try to maintain a relatively clear line of sight, or prioritize placement near doorways.
-
Avoid Interference: Keep the node at least a few feet away from other devices that use the 2.4GHz spectrum, such as microwaves, baby monitors, cordless phones, and large electrical appliances.
(Optional but Recommended: Use an Ethernet cable for the backhaul connection for maximum speed, bypassing Wi-Fi placement limits entirely.)
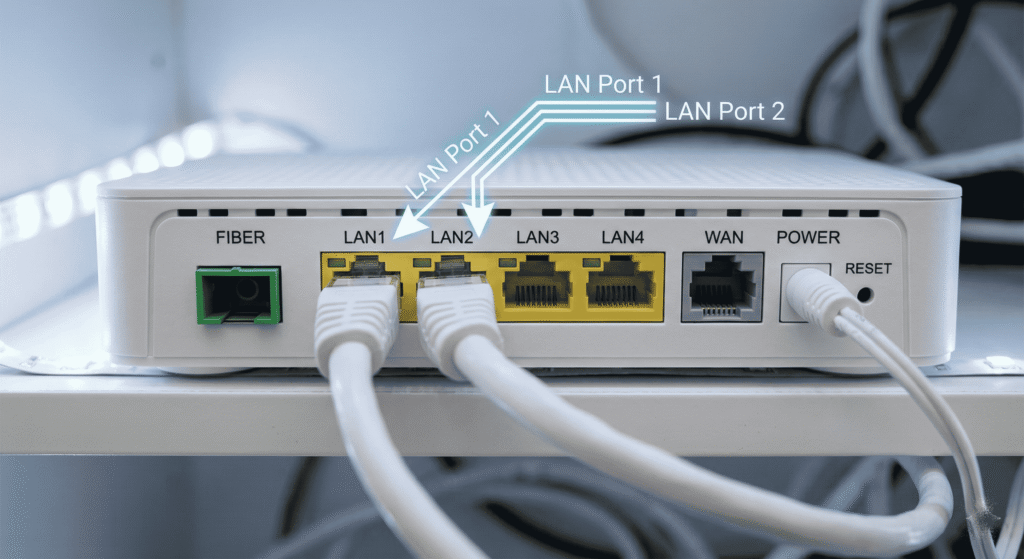
Understanding Your Router: Extension to Ezee Fiber Router Port and Cable Identification
To begin the wired connection portion (Method 2), you must be familiar with the different ports on your equipment. Using the wrong port can prevent the extension from syncing correctly.
Step-by-Step Guide: Adding the Ezee Fiber Extension
(Note: The exact method can vary slightly depending on the specific hardware generation provided by Ezee Fiber. Always consult the official setup app or documentation provided with your kit.)
We will outline the two standard methods.
Method 1: Native Wireless WPS (WiFi Protected Setup) Sync
This is often the easiest method and is typically recommended for your first extension.
Standard WPS Pairing Procedure:
-
Placement (Initial Sync): Bring your new Ezee Fiber extension node into the same room as your primary gateway. You will move it to its permanent location after it is successfully synced.
-
Power On: Plug the new extension node into a power outlet. Wait 2-3 minutes for the node’s indicator lights to stabilize (often blinking slow white or solid amber).
-
Activate WPS on the Primary Gateway: Locate the physical WPS button on your main Ezee Fiber router and press it for 2-3 seconds. An indicator light (often labeled WPS or the Wi-Fi symbol) should begin to blink rapidly. This signals that the router is actively searching for new devices.
-
Activate WPS on the Extension: Within two minutes, press and hold the WPS button on the new extension node for 2-3 seconds. Its indicator lights should also begin blinking rapidly.
-
Wait for Sync: The nodes will communicate and exchange security keys. This can take several minutes. You will know the sync is successful when the rapid blinking stops, and the indicator light on the extension node turns a stable, solid color (usually solid blue or solid white).
-
Optimal Relocation: Now that the node is synced to the primary network, you can unplug it and move it to the optimal location you identified earlier. When you plug it back in at its permanent spot, it will automatically search for and reconnect to the main router.
Here is one of the fantastic router you can buy at AMAZON
Method 2: Wired Ethernet Backhaul (Superior Performance)
This method offers the absolute best performance and stability. Because the extension node communicates with the main router over a physical, Gigabit Ethernet cable, the Wi-Fi spectrum is 100% available for your devices, bypassing all placement limitations and interference entirely.
Wired Setup Procedure (App-Guided):
We recommend using the official Ezee Fiber management app for this process.
-
Placement: Place the extension node in its permanent location. Unlike the wireless method, you do not need to perform an initial sync near the primary gateway.
-
Wired Connection: Run an Ethernet cable from any open LAN port on your main Ezee Fiber router and connect it directly to the WAN or Internet port on the new extension node.
-
Power On: Plug the extension node into a power outlet.
-
Open the App: Launch the official Ezee Fiber Network Management App on your smartphone.
-
Add a Node: Navigate to the ‘Network’ or ‘Devices’ section and look for an option to ‘Add a Mesh Node’ or ‘Expand Network.’
-
App Guidance: The app will guide you through the process, instructing you to confirm that the node is powered on and physically connected. It will automatically detect the new node over the Ethernet connection.
-
Finalization: The app will finalize the configuration. The indicator light on the extension will stabilize (often turning solid blue). The app should now show all your nodes (primary and extension) connected and operational in a ‘Mesh Map’ view.
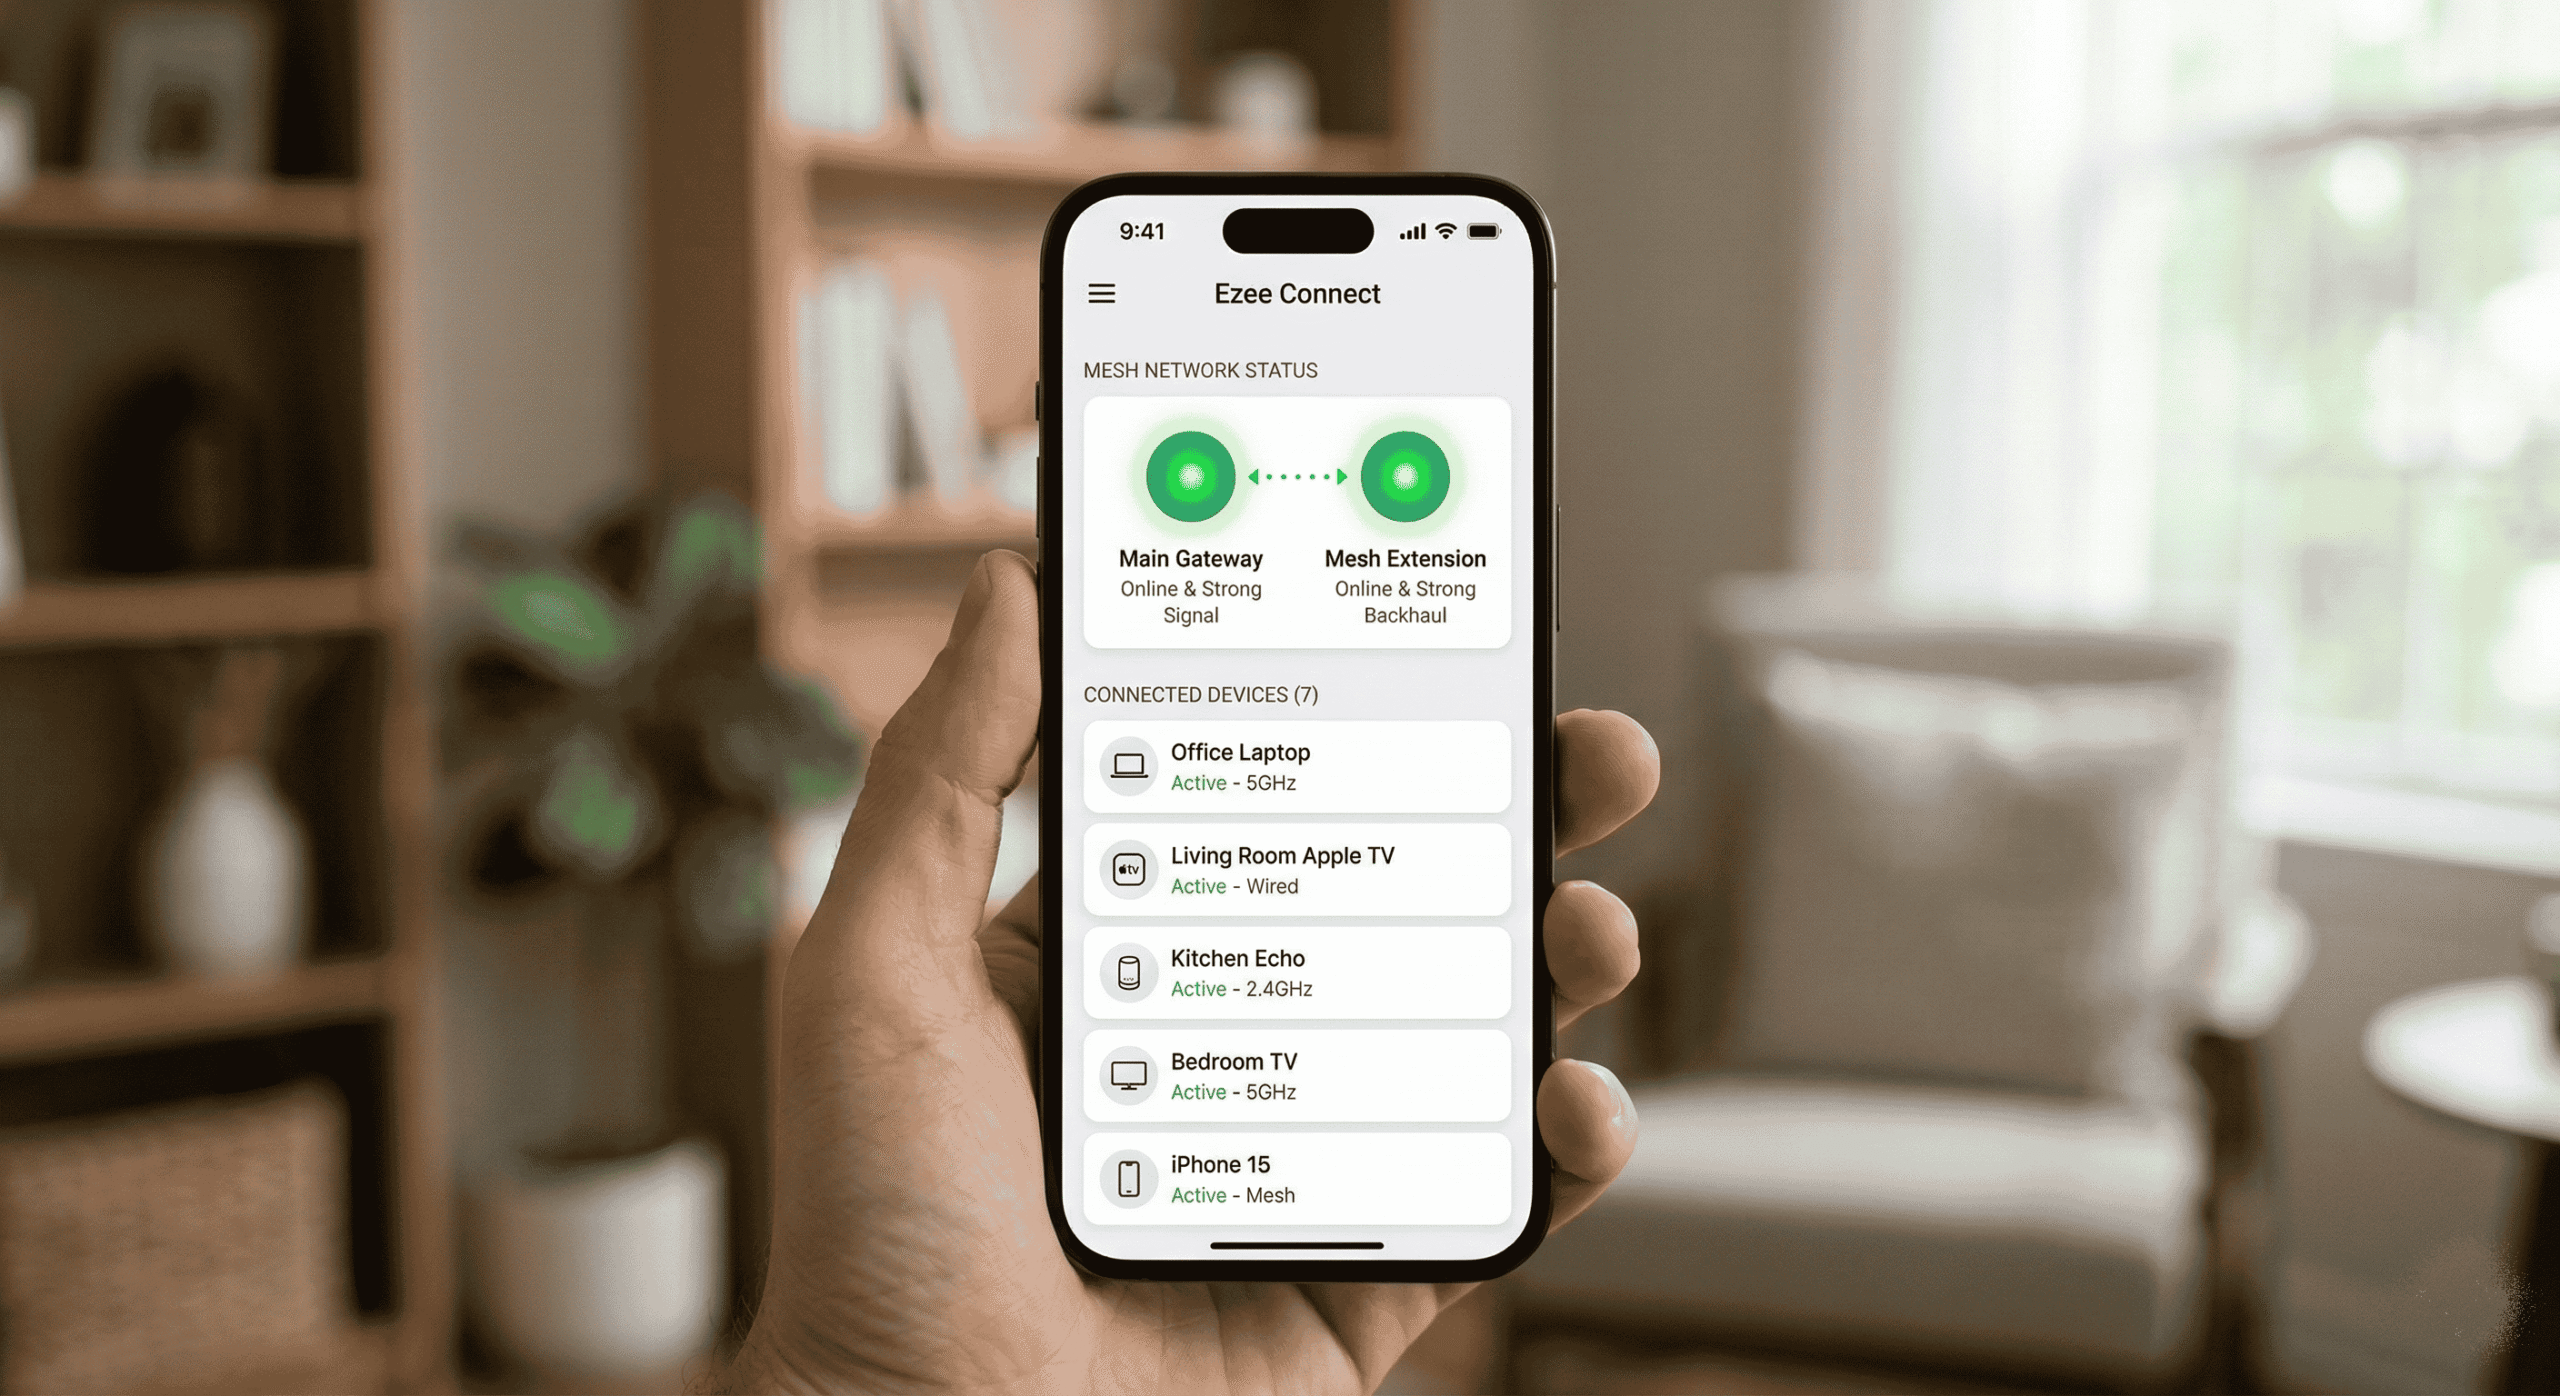
Verifying with the Ezee Fiber App (Image 3):
The easiest way to confirm everything is working correctly is with the visual feedback from the network app.
Advanced How to Add an Extension to Ezee Fiber Router Configuration via the Ezee Fiber App
Your setup is not complete until you leverage the advanced tools in your management app. This allows you to monitor network health and optimize performance.
Checking Backhaul Signal Strength
Native mesh systems often use a invisible connection (the “backhaul”) to talk between nodes. In your app’s ‘Mesh Map’ or ‘Device List’, locate the entry for your new extension. The app should display a specific signal strength for the link between the extension and the main router (e.g., “Good,” “Fair,” or “Poor”).
-
If the app reports “Fair” or “Poor,” move the wireless extension a few feet closer to the main router or prioritize a wired connection.
Optimizing Device Connection (Band Steering)
Modern mesh systems use “band steering” to automatically direct devices to the optimal radio band. The app centrally manages this, ensuring:
-
2.4GHz: High-bandwidth, long-range connection for smart home devices (plugs, cameras, bulbs) that don’t need maximum speed.
-
5GHz: Maximum symmetrical speed, shorter-range connection for devices demanding high performance (gaming, streaming 4K).
The app should manage this dynamic steering, but you can usually verify that both bands are enabled and broadcast a single Wi-Fi name. [Optional Advanced Step: Some apps allow you to manually ‘pin’ high-priority devices, like a gaming console or home office PC, directly to the closest extension node.]
Conclusion: Seamless, Fast, and Whole-Home
By adding a native Ezee Fiber mesh extension, you are not just boosting a signal; you are architecting a seamless, high-performance network that delivers blistering symmetrical fiber speeds to every corner of your home. You eliminate frustrating dead spots, ensure seamless roaming for your video calls, and provide the robust foundation that a modern connected home demands.
The process, while simple, requires careful adherence to optimal placement principles. Whether you choose the Native Wireless WPS sync for its simplicity or the Wired Ethernet Backhaul for its maximum performance, following this guide ensures a safe, effective installation. Your entire family can finally enjoy the speed and reliability they deserve.
Frequently Asked Questions (FAQs)
Q: Can I use a generic Wi-Fi extender with my Ezee Fiber router? A: It is technically possible but strongly discouraged. Generic extenders often slash available bandwidth, create a separate, inferior network name (requiring manual switching), and lack seamless roaming capabilities. For a proper, high-performance mesh network, always use a native Ezee Fiber extension node.
Q: Where is the best place to put the extension? A: Follow the halfway principle. Place the node approximately halfway between your main Ezee Fiber router and the area you are trying to cover. The extension must be close enough to the primary router to receive a strong signal to repeat. Avoid placement inside cabinets, behind sofas, or near massive physical obstructions like brick walls and mirrors.
Q: How many extensions can I add? A: Most robust native mesh systems, including those used by Ezee Fiber, can easily handle 2-3 extensions without signal degradation, potentially covering very large homes up to 5,000+ square feet. Consult the specific documentation for your kit, as the maximum number of supported nodes can vary.
Q: What is the benefit of a wired Ethernet backhaul? A: A wired backhaul uses a physical Ethernet cable (Method 2) for the communication between the extension node and the main router. This is the ultimate connection method, as it bypasses wireless interference and distance limitations entirely. It leaves the primary 2.4GHz and 5GHz Wi-Fi bands 100% available for your devices, maximizing speed and reliability for high-demand devices like gaming consoles and streaming boxes.
Q: What do the different indicator lights mean on the extension node? A: The specific colors and patterns (blinking white, solid blue, blinking amber) can vary slightly by hardware generation. Generally:
-
Blinking slow white/amber: The node is booting up or searching for a network.
-
Rapid blinking white: WPS pairing is active and searching for another node.
-
Solid Blue/White (Successful): The node is successfully synced to the primary gateway and broadcasting a strong Wi-Fi signal.
If you want to look for more product please CLICK HERE